A lot of the puzzles in Another Code: Recollection have been changed from the DS version, and while they’re not very difficult, it’s easy to miss something small and find yourself walking in circles. When it comes to Welles the butler’s safe, this is how you solve it.
You may have already spotted the silver plates scattered around the accessible areas of the Edwards Mansion. The gamer in you probably knows that they’re going to be used in a puzzle, but the characters don’t. You won’t have the option to pick them up. Likewise, if you interact with the safe, Ashley will say that she doesn’t know the combination, and that is that. There’s no option to guess. If I just gave you the solution here (and I will), it wouldn’t do you much good.

In order to trigger the puzzle, you need to look at the portrait in the Butler’s room. This requires you to actually look up, and you’ll see an image of Welles and his wife. Behind them, over the wife’s shoulder, is a row of plates. Inspecting these will have the characters muse on their importance, and then you can start grabbing them.
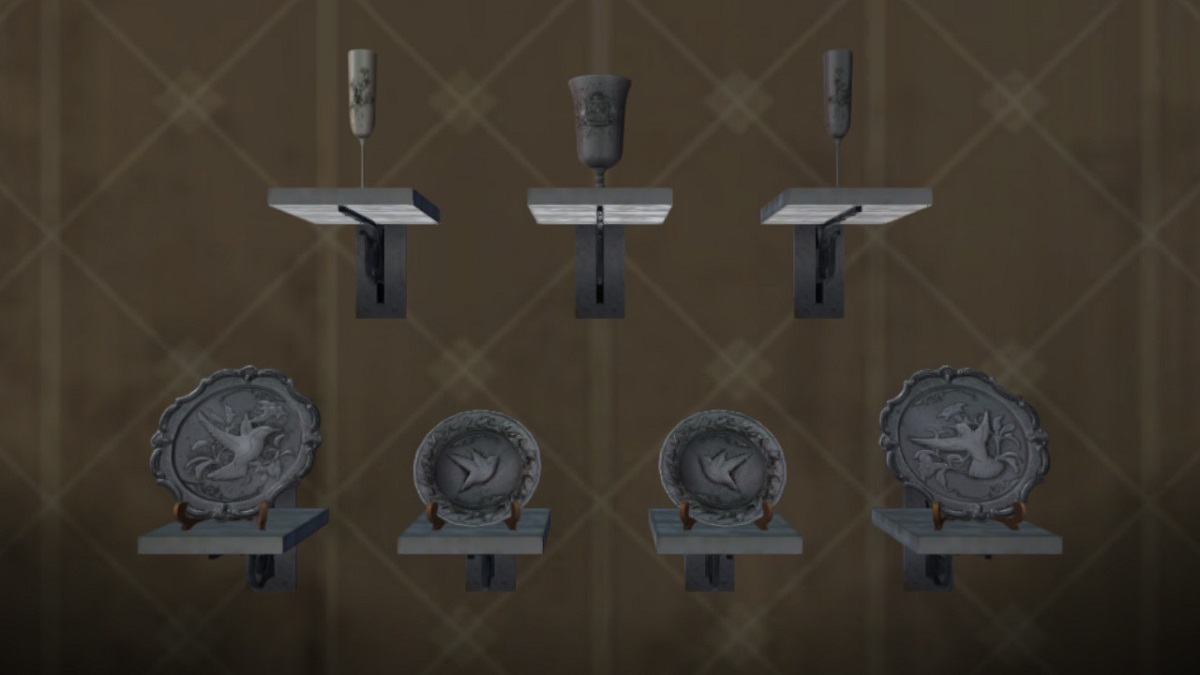
There are three plates. One of them is in Welles’ desk in the room you’re standing in, another is beneath the chocolate bar in the art room, the last is in the music room being used as an ashtray. Once you have these, you can inspect the display shelf to begin the puzzle.
Placing the plates is pretty simple, but to clarify the order they should go to, you can look at the portrait again to see where they were set previously. From the left, the large plate with the bird facing right goes first, followed by the small plate with the right-facing bird next. That just leaves the small plate with the bird facing left. Once they’re set, the mechanism will activate and… the portrait swings open. You were expecting the safe, right? Me too, but it’s only the first step.

Inspect the shelf behind the portrait, and you’ll find a map, which probably doesn’t seem helpful. However, if you bring up your map (the L button), you can see that over Butler’s Room, there’s a code. I’m not sure if this is randomized, but the code I got is R13, L4, R9, L18. Now, you can interact with the safe.
One thing that threw me off is that L is to rotate clockwise and R is to rotate counter-clockwise. Initially, I thought the code was saying R is rotating to the right (clockwise) and L is to the left (counter-clockwise). That’s not the case; it’s literally saying you need to hold R until it reaches the 13th notch on the dial, then hold L until it rotates to the fourth spot.
Also, just to warn you, unless this got patched, the dial is extremely finicky when it comes to landing on the right spot. You have to hold it and let go at exactly the correct moment for it to land on the notch you want. If you over or undershoot it, you need to start all over and try again.
Once it’s open, you’ll find a pair of keys and the Butler’s memoirs.