The Spiral Abyss is the hardest repeatable content in Genshin Impact. Achieving 36 stars is not easy, but Destructoid is here with some team suggestions and tips to help you get those last few stars! Here are the best teams and strategies for the current Spiral Abyss Floor 12.
Current Abyss cycle ends on:
January 31
Best teams and strategies
Suggested teams for the first half:
- Ayaka – Kazuha – Shenhe – Diona/Layla
- Raiden – Sara – Bennett – Kazuha
- Bennett – Xiangling – Rosaria – Sucrose
- Pretty much anything that’s not Physical or Hydro.
The first half features either bosses or waves of one to two enemies, encouraging teams that focus on single-target damage. Avoid Physical teams if you’re not confident that you can overcome the Ruin enemies’ Physical RES. You should also avoid Hydro DPS units since the Hydro Tulpa is immune to Hydro damage. Otherwise, there’s a lot of flexibility for you to play whomever you like!
Suggested teams for the second half:
- Yoimiya – Xingqiu – Yelan – Bennett
- Tighnari – Nahida – Fischl – Diona
- Wanderer – Faruzan – Furina – healer
- Pretty much anything that’s not Electro or Geo.
Ranged characters like Yoimiya and Tighnari are a godsend against the Thunder Manifestation. Avoid Electro or Geo as your primary damage sources, since there are enemies that resist these elements. Aside from elemental immunities though, anything goes. Have fun and enjoy the freedom to play your favorite teams!
Blessing of the Waning Moon
After picking up three Crystallize shards, you will unleash an instance of AoE True DMG centered around your character. This ability has a cooldown of 6 seconds. Once again, this blessing favors Navia teams, but also benefits Geo teams in general. Noelle and Itto players will have a great time. If you don’t have Navia or Gorou to suck the shards towards you, or if you prefer ranged teammates, you may have to go out of your way to pick up the shards. Or don’t; the blessing is fun, but only shortens clear times by a few seconds, if at all.
Floor 12 Chamber 1
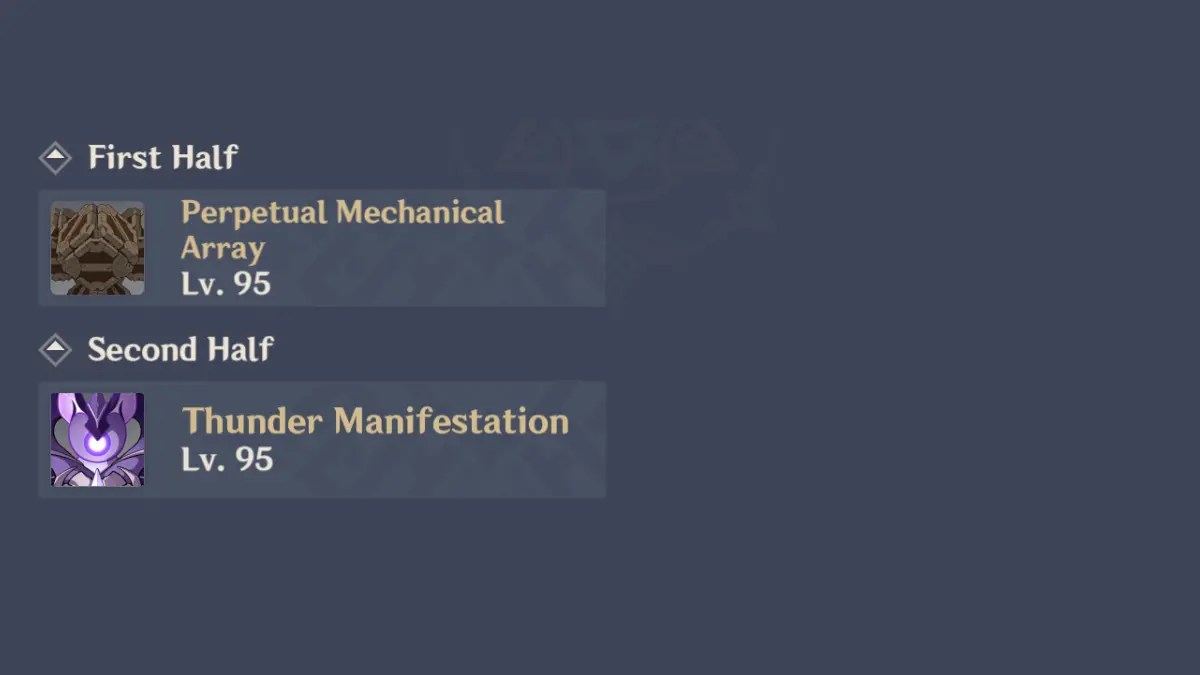
First Half
Wave 1: Perpetual Mechanical Array
Second Half
Wave 1: Thunder Manifestation
Tips
The Perpetual Mechanical Array has increased RES to Physical damage and enters an invincibility phase at 50% health that is nearly impossible to skip. It will spawn several smaller Ruin machines around it, one of which will be highlighted by a ring of golden symbols. Defeat this specific machine and ignore the others. Once the highlighted machine is down, the Perpetual Mechanical Array core will become stunned and vulnerable to attack. As long as you’re able to deal enough damage during its non-invincible phase, you can pretty much bring any team you like. Avoid Physical teams if you’re unsure, but a well-built Physical DPS can still brute-force this boss.
The Thunder Manifestation is immune to Electro damage, but comes infused with an Electro aura for free reactions. It’s also very slippery, repeatedly dashing to one side of the arena and forcing you to chase after it. Yoimiya, Xingqiu, Yelan, Nahida, and Tighnari are my personal favorite characters to counter the Thunder Manifestation since their attacks have significant range. Dendro DPS characters in general are great, since they get free Spreads without having to rely on an Electro teammate.
Floor 12 Chamber 2
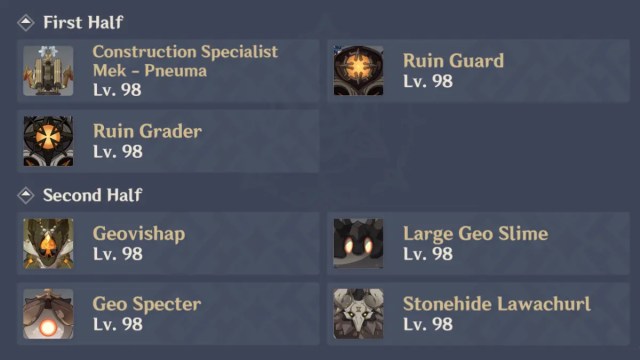
First Half
Wave 1: 1 Construction Mek (Pneuma)
Wave 2: 1 Ruin Guard
Wave 3: 2 Ruin Graders
Second Half
Wave 1: 3 Large Geo Slimes, 2 Geo Specters
Wave 2: 1 Hydro Geovishap, 1 Pyro Geovishap
Wave 3: 2 Stonehide Lawachurls
Tips
For the first half, the Ruin Guard and Graders are resistant to Physical damage. You can still brute-force them with a Physical DPS if your characters are built well enough, but I recommend an elemental team. Otherwise, nothing special here, just defeat the enemies as they appear.
The second half has a wave of enemies that are immune to Geo damage. Overload or blunt attacks can break the Geo slimes’ shields, but you can also deplete these shields by simply doing enough damage. As long as your main source of damage is not Geo, they shouldn’t pose a problem. The Stonehide Lawachurls hit pretty hard though, and they can easily combo you if you’re not careful. Bring a strong shielder or healer, or just try to be alert for when they wind up for an attack.
Floor 12 Chamber 3
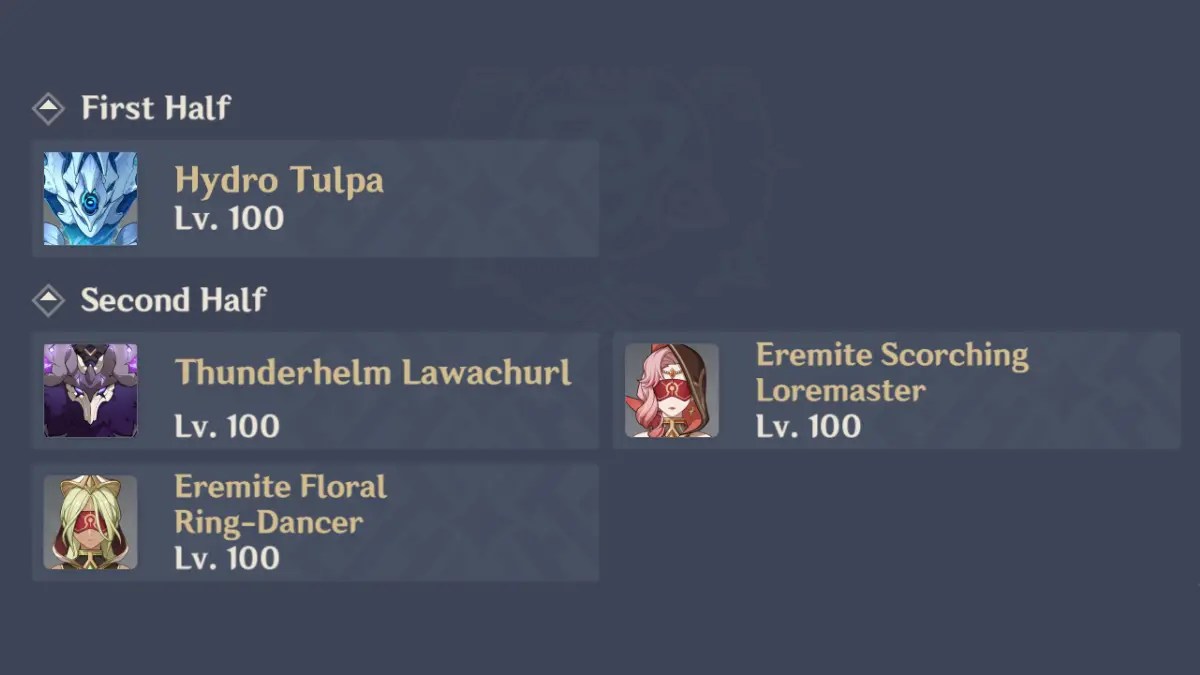
First Half
Wave 1: Hydro Tulpa
Second Half
Wave 1: 2 Thunderhelm Lawachurls
Wave 2: 1 Dendro Eremite Summoner, 1 Pyro Eremite Summoner
Tips
The Hydro Tulpa is immune to Hydro damage. At intervals, it will summon a mini Tulpa to fight alongside it. Destroy the mini Tulpas with reactions. Cryo and Dendro are most effective, but Geo, Anemo, Pyro, and Electro all work too. Do not ignore the mini Tulpas. If they are left alone, the Hydro Tulpa will absorb the mini Tulpas, buffing its own attacks and increasing its RES to all elements. As long as you are able to deal with the mini Tulpas, you can bring any team you like.
The second half has two Thunderhelm Lawachurls that, like in the previous chamber, can easily combo an unsuspecting traveler. Either bring some defensive utility or be alert when dodging. The two Eremite Summoners will immediately summon their familiars, becoming resistant to damage and immune to crowd-control. Killing a familiar will stun its owner, but the summoners can still take damage with or without its familiar. I like to just brute-force my way past this mechanic by ignoring the familiars and dealing damage to the summoners directly, but you might find it easier to attack the familiars first. Either way, watch out for Burning.